My Garage
Cart
Make sure this part fits

Kia 241002G000 Intake Camshaft Assembly

2006-2015 Kia

Customer Questions & Expert Answers (6)
241002G000 Kia Intake Camshaft Assembly Product Photo 1 of 4
  • Part Description
    Camshaft Assembly-Intake
  • Part Code
    24100C
  • Replaces
    241002G600, 241002G100, 241002G010, 241002G650
  • Manufacturer
    Kia
Make sure this part fits
$190.26 MSRP: $276.95
You Save: $86.69 (32%)
Ships in 1-3 Business Days
1
ADD TO CART
  • Related Parts
  • Specifications
  • Fitment
  • Q&A
  • Product Specifications

    BrandGenuine Kia
    Part Code24100C
    Manufacturer Part Number241002G000
    Part DescriptionCamshaft Assembly-Intake
    Other NamesCamshaft, Intake Camshaft
    Item Dimensions22.1 x 2.1 x 2.1 inches
    Item Weight5.40 Pounds
    ConditionNew
    Fitment TypeDirect Replacement
    Replaces241002G600, 241002G100, 241002G010, 241002G650
    ManufacturerKia
    SKU241002G000
    WarrantyThis genuine Kia part is guaranteed by Kia's factory warranty.
    Shipping & ReturnShipping Policy Return Policy
    Warning: California's Proposition 65
  • Vehicle Fitment

    Year Make Model Trim & Engine Important vehicle option details
    2009-2013 Kia Forte2.0L - Theta 2, 2.4L - Theta 2Coupe - 2Door 5P, Sedan - 4Door 5P, Sedan - 5Door 5P
    2009-2013 Kia Forte Koup2.0L - Theta 2, 2.4L - Theta 2Coupe - 2Door 5P, Sedan - 4Door 5P, Sedan - 5Door 5P
    2006-2015 Kia Optima2.0L - Theta 2, 2.4L - Theta 2, 2.4L - Theta FFSedan - 4Door 5P
    2006-2011 Kia Rondo2.4L - Theta 2Wagon - 5Door 5P, Wagon - 5Door 7P
    2009-2014 Kia Sorento2.4L - Theta 2Wagon - 5Door 5P, Wagon - 5Door 7P
    2010-2015 Kia Sportage2.0L - Theta 2, 2.4L - Theta 2Wagon - 5Door 5P
  • Customer Questions & Expert Answers

    Q:
    Can you please confirm fitment and describe this part? Posted by KiaPartsNow Specialist
    A:
    You can Select Your Vehicle to check if 241002G000 fits your vehicle.
    Posted by KiaPartsNow Specialist
    Q:
    How to remove and reinstall the Camshaft on Kia Sorento for V6 engine? Posted by Customer
    A:
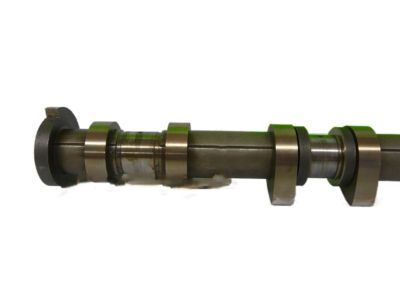
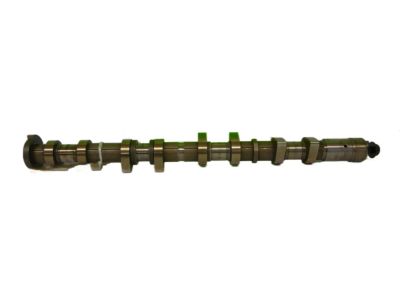
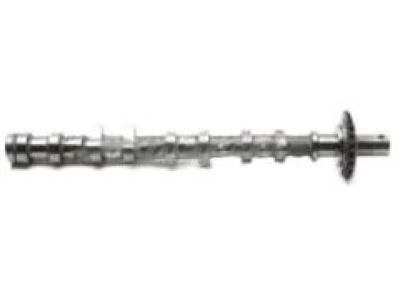
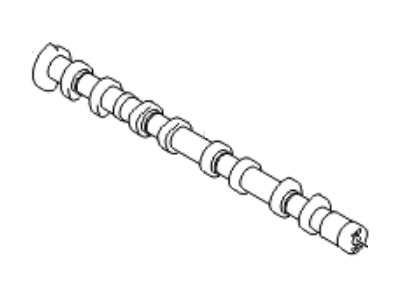
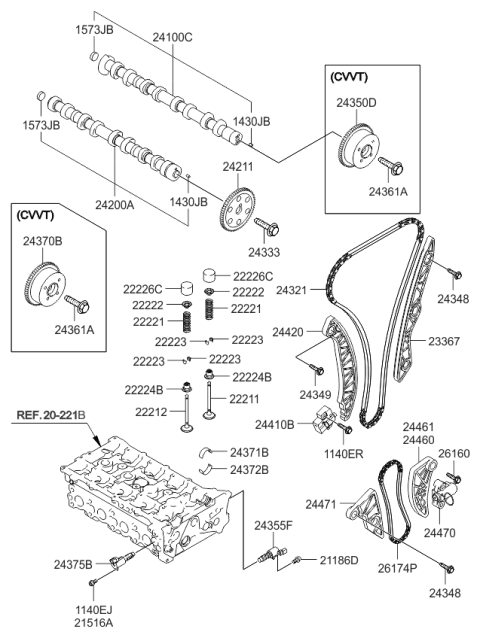
    To remove the Continuous Variable Valve Timing (CVVT) assembly on the camshafts, do not disassemble it; instead, remove the center bolt from the end of the camshaft. Begin by positioning the engine at TDC, then remove the valve covers, timing chain or belt, and camshaft sprockets. Ensure the cam timing marks on the sprockets and engine are aligned. Remove the Oil Control Valve (OCV) mounting bolts and the valves from the front camshaft bearing caps, marking the camshafts clearly to avoid confusion. Loosen the camshaft bearing cap bolts in 1/4-turn increments in reverse order of tightening until they can be removed by hand, starting with the outer caps. The bearing caps are marked for intake and exhaust; store them in the correct order. If applicable, remove the valve hydraulic adjusters and rocker arms on earlier models, or the bucket-style lifters on later models, storing them separately. Apply camshaft installation lubricant to the camshaft lobes and bearing journals, then install the lifters or lash adjusters and rocker arms in their original positions. For later V6 engines, install the timing chains around the sprockets and ensure the timing marks are aligned. For earlier models, place each camshaft in its original position and verify the timing marks. Install the bearing caps in numerical order with arrows pointing toward the timing belt end, and install a new camshaft oil seal if necessary. Reinstall remaining components in reverse order of removal, tightening the bearing cap bolts to the specified torque. Verify that all timing marks are aligned to prevent major engine damage, then run the engine and check for leaks and proper operation. For valve clearance adjustment on later V6 engines, remove the valve cover and set the number one cylinder to TDC on the compression stroke. Measure the clearance between the camshaft lobes and lifters using a feeler gauge, noting the figures. Rotate the engine one turn clockwise and repeat the procedure for the remaining valves. If clearances are outside limits, remove the camshaft(s) and lifter from the incorrect location, measure its thickness, and calculate the correct thickness for a new lifter. Purchase and install replacement lifters, then check clearances again to ensure they are within specification. Apply camshaft installation lubricant, install the lash adjusters, place each camshaft in its original position, verify timing marks, and install the bearing caps in numerical order, tightening the bolts in sequence.
    Posted by KiaPartsNow Specialist
    Q:
    How should camshafts be inspected and installed on Kia Sorento for four cylinder engine? Posted by Customer
    A:
    Camshafts should always be checked very well before being fitted while endplay of the camshaft should be checked before the removal of the same. Start with the procedure of removing the cable of negative terminal of the battery and engine setting at TDC for No: 1 cylinder. If it is GDI models, first, you have to deal with the engine remove the high pressure fuel pump next, after that, you will have to take off the valve cover. With the TDC marks aligned, put the large wrench on the camshaft and then remove the bolts of the camshaft phaser sprocket but do not take them off completely. Take out the bolt of the service hole in the timing chain cover and it is imperative for one to clean any Loc-tight sealer that may have stuck to the threads if any. For MPI models, there is a special tool to engage with the timing chain tensioner and unlock it, for GDI models the tensioner ratchet should be unlocked using a screwdriver. Remove the front bearing cap, and raise the chain off the sprocket and onto the camshafts; then, unscrew the bolts of the front bearing cap and the upper bearing. Undo the remaining camshaft cap bolts gradually beginning from the outer ones and take off the camshafts from the cylinder head and retain the caps for re-fittingting. Take out the lifters; also ensure that these are in order too. If it is necessary, take off the camshaft phaser sprocket and check all the elements for signs of wear. Previous to the removing of the camshafts, fit the camshaft with a dial indicator to check the end play and observe the condition of the bearing witnesses also. Check the OD of each camshaft bearing journal and the ID of the matching bearings to determine the oil clearance and replace any of them that are beyond the established standards. Take height of the camshaft lobe and also measure the run out on the lobes by using a dial indicator. Scuff each of the lifters in turn. Coating these with the fresh engine oil before reinstalling them in their intended positions ought to be the area where the exhaust camshaft lower bearing will be fitted and the camshaft phaser sprockets. Put on some lubricant for the camshaft lobes and the journals, the camshaft has to be installed with the T.D.C marks in firm sight of each other old camshaft has to go back to where it was. Then put in the upper bearing and the bearing caps and use the right torque to tighten it with a sequence. Position the timing chain over the camshaft sprockets so that it lines up with the phaser sprocket, and fasten the phaser sprocket bolts. For MPI models take out the special tool and check the timing marks; for GDI models take off the tensioner link. Place and fasten a new service hole bolt. For adjustment, you should have the valve cover off and the number one cylinder at TDC on the compression stroke and then using a feeler gauge, check the clearance between the camshaft lobes and the lifters. Turn the engine again and do the same for the other valves; replace the lifters with improper clearances with new ones. Check the thickness of the lifter head then find the right thickness for the replacement. If new lifters and camshafts have been installed, verify clearances, apply installation lubricant to each lash adjuster and replace the lash adjusters to the position they were previously in. Position each camshaft back to their original position and align the timing marks and then install each bearing caps in a sequential manner and then tightening the bolts to the wished torque.
    Posted by KiaPartsNow Specialist
    Q:
    Should camshafts be thoroughly inspected before installation, and what steps should be taken to ensure proper alignment and clearance during the process on Kia Optima? Posted by Customer
    A:
    As for the camshafts, they must be inspected scrupulously before the part is to be installed, whereas, camshaft endplay should be measured before the removal of the part. Start with the removal of the cable from the negative terminal of the battery and positioning of the engine at TDC for the number 1 cylinder with the timing marks in line. Next, take off the valve cover,paint the timing belt and camshaft sprockets if they will be aligned later on. On the models produced from 2001 to 2006, the timing belt must be disconnected from the camshaft sprockets while noting its alignment; On all 2006.5- year models, the timing chain must be removed. Ensure the camshaft does not rotate during this time as you remove the sprocket bolts, next measure the end-play of the camshaft. Loosen and take out the front camshaft bearing cap next, then all the other caps and the camshafts but it is wise to retain them in order for assembly. Take off the lash adjusters or lifters and examine all the parts for deterioration. When nurturing to remove the camshaft, the end play of the same must be measured using the dial gauge while the bearing surfaces checked for wear or damage. Camshaft bearing journal diameter should be measured and its comparison should be made with the standard provided to find out the oil clearance. Check the height of each camshaft lobe to specification and check the runout to .001 of an inch on a dial indicator. Check hydraulic adjusters or lifters on what extent they have worn out. For installation, apply a thin layer of oil on the lash adjusters or lifters and on the camshaft lobes and then, align the cams and fit it in the cylinder head in the correct position. Place the bearing caps back in and tighten all the bolts evenly, the camshaft oil seal should be replaced if needed. Rub the camshaft sprocket teeth against the timing belt and ensure the match marks are adjacent then fit the camshaft position sensor. Continuation of the remaining part is in the reverse order to the removal part of the installation. A cut-down bucket style lifter is installed for later models from 2006.5 and the appropriate thickness is used to adjust the valve clearance. Open the valve cover and take the engine to TDC to compare the clearance of some values with the help of a feeler gauge. 'Twist' the engine and take the measurement of the remainder of the valves, changing lifters as equivalent to the thickness measurement. It is recommended after the litters and camshafts have been installed, one should check the clearances before removing the valve cover.
    Posted by KiaPartsNow Specialist
    Q:
    How to remove and reinstall engine components, including camshafts, while ensuring proper alignment and orientation on Kia Sportage for V6 engine? Posted by Customer
    A:
    Before in order to incur an engine disassembly the engine has to be placed at TDC, then the valve covers and the timing belt have to be pulled off. When fitting the camshafts, make sure the marks you previously made on the sprockets and the engineblocks match as the camshafts are different; label them. Before de-borating the camshaft bearing caps, observe the upward pointing arrows on each cap to show the correct way of the caps and write numbers on them to distinguish the order in which you removed them. Tighten the cap bolts slowly to enable the camshaft(s) to lift evenly off the head this will take between 30-45 mins. Intake and exhaust bearing caps are identified by the I and E labels respectively and the heads must be removed together with the camshaft due to the connection of timing chain. It is recommended to retain the position of the bearing caps and any that had to be removed valve lifters for refitting. In case of inspections, one should follow the required processes for camshafts with specific specifications for V6 engines. To install the camshaft, the camshaft installation lubricant should be applied to the lobes and bearing journals, the lifters also should be replaced to their position, the timing chains have to be wrapped around the sprockets with the marks aligned. Place the bearing caps in numerical order with their arrow like pointing towards the side of the drive belt end, and gradually tightening the bolts up to the limit supply for proper seating. If it is necessary, you have to fit a new camshaft oil seal, then fit all the other parts in the reverse order to their removal. Ensure that all the timing marks are properly aligned to avoid any huge loss in the engine; the last one is to start the engine and look for any signs of leakage, and the normal functioning of the engine.
    Posted by KiaPartsNow Specialist
    Q:
    Looking for the camshaft cap and bearings. Is this not sold as a replacement? Posted by Customer: 2013 Kia Sportage
    A:
    This is the intake camshaft assembly.
    Posted by KiaPartsNow Specialist 16/6/2025
    If you have any questions about this product, please don't hesitate to ask us. We will be happy to help you!

Genuine Kia Part 241002G000, the Right Choice

For assured reliability, buy Kia part # 241002G000 Intake Camshaft Assembly. Also known as Camshaft. They are produced at the official Kia factory to ensure durability and precise fit. These components undergo rigorous quality control tests to remove any defects. This will fit 2006-2015 Optima, 2006-2011 Rondo, 2009-2014 Sorento, 2010-2015 Sportage.

KiaPartsNow.com is a major distributor of genuine Kia parts and accessories including 241002G000 Intake Camshaft Assembly. Our site supplies OEM parts you can trust. We stock a wide range of genuine OEM parts available at reasonable prices. Besides, we have simple returns and swift delivery to ensure a seamless shopping experience.

Why choose Kia Parts Now

  • Dedicated Service

    Your complete satisfaction is our #1 goal

  • Lowest Prices

    Best deals on genuine OE parts from dealerships

  • Fast Delivery

    Orders are processed and delivered promptly